|
BitFaster 15.0 Help |
|
|
Import Data |
|
|
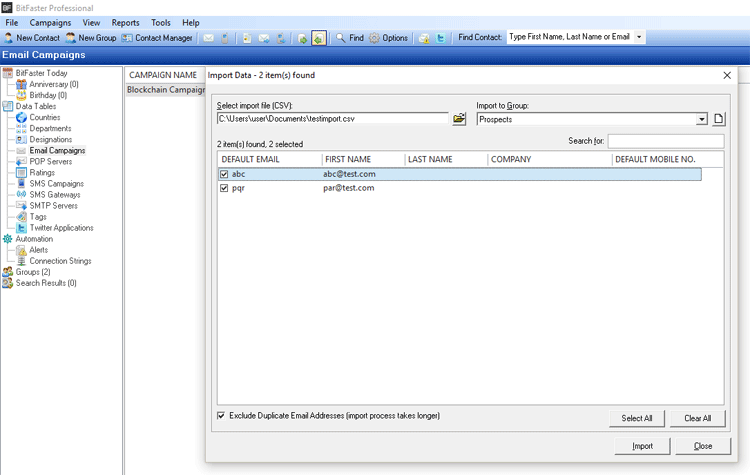
With BitFaster, you can import your existing contacts in a jiffy. You just need a text file (Comma Separated file - CSV) with the Default Email address, First Name, Last Name, Company Name and Default Mobile number of your contacts (columns in the same sequence). Please Note: There are only two fields that are mandatory in BitFaster - First Name and Email Address. Rest of the fields could be left blank.
Make sure the sequence of fields in your CSV file is the same as the one shown in the Data Preview columns. You can use a tool like Microsoft Excel to format your CSV file easily as the CSV files generated by email clients many not match the sequence that's required by BitFaster. Once you have your CSV file ready, click on the Import icon in the toolbar or choose File > Import Data... to bring up the Import Data window. Click on the Browse File icon (next to the Select import file option). Choose the CSV file you have created previously and click on Open. BitFaster displays all the records found in the CSV file in the Data Preview box. Check or tick the records you want to import and then choose the Group under which you want the Contacts to be placed. Now when you click on the Import button, all the selected records are imported to the selected Group. Records that are successfully imported will be displayed in Blue color. If for some reason a record cannot be imported, the entire row will be displayed in Red color. |
|